NOTE: I do not yet have a service manual so I was not able to provide all the torque values. Check further down the page for those. Sorry.
REMOVAL:
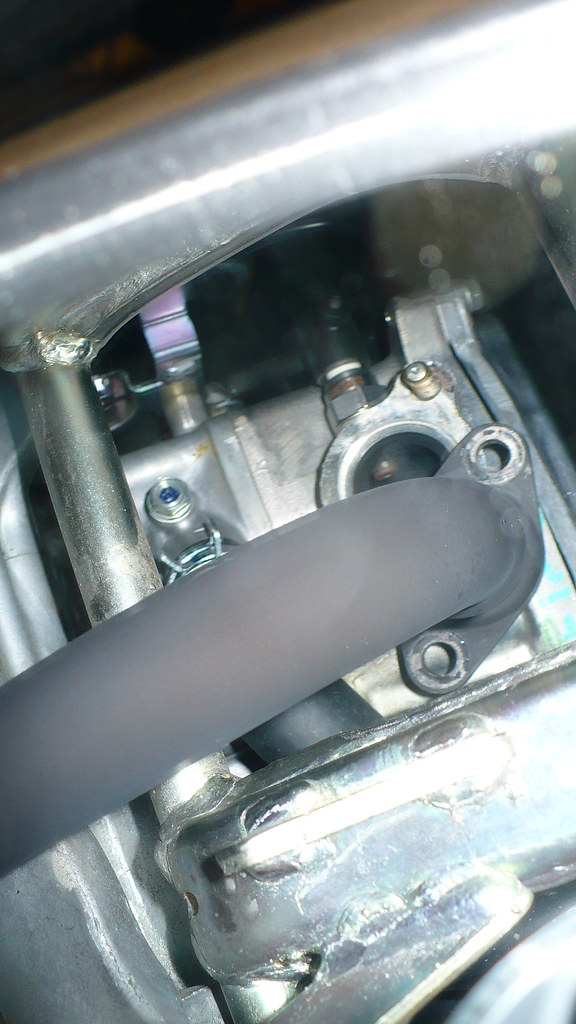
1) Start by borrowing your wife/girlfriend's cosmetic mirror and set it under the scooter. I had a motorcycle mirror handy so it had to do. Lie on the ground and loosen the two 10mm muffler bolts at the manifold. Use an extension to avoid swearing.
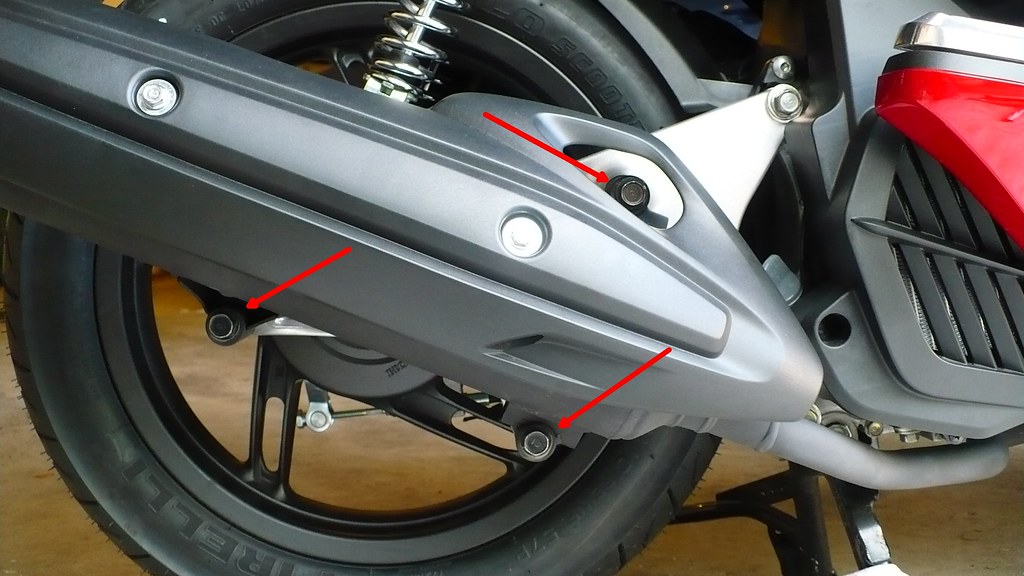
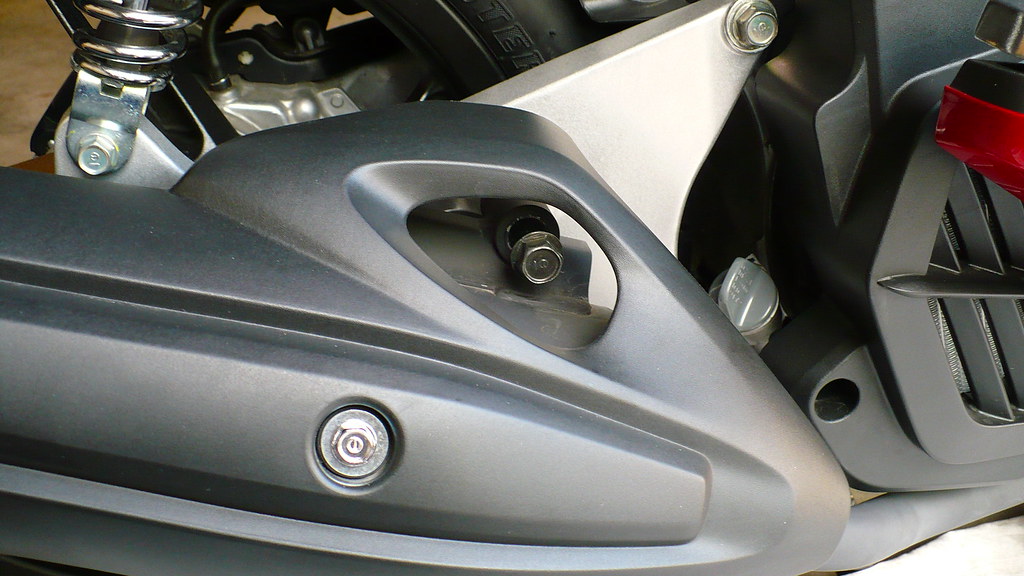
2) Loosen the 3 bolts holding the muffler. From this view we can see that the heat shield does not need to be removed.
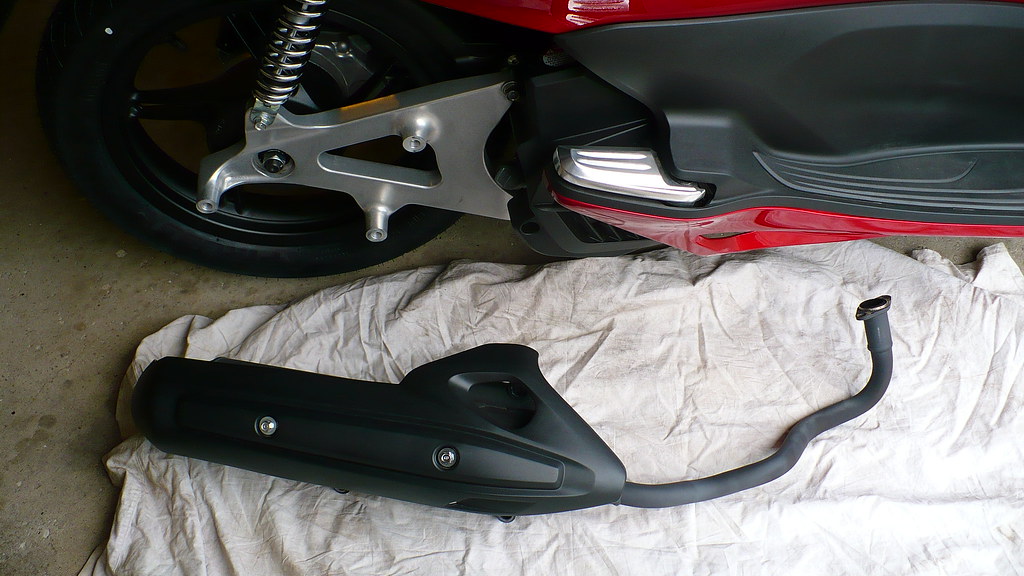
Remove the 2 lower bolts and the the upper bolt and then remove the muffler and place it somewhere.
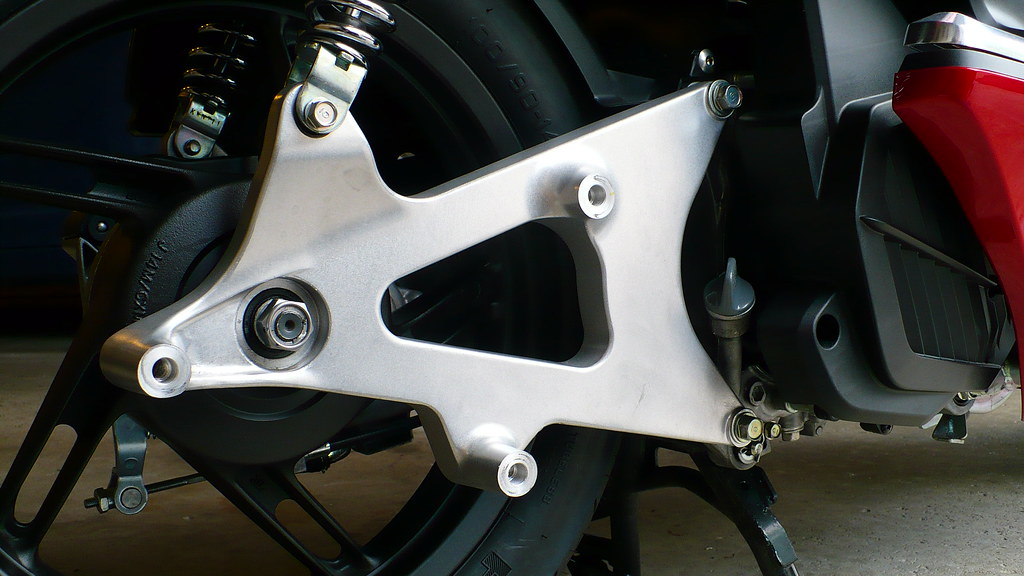
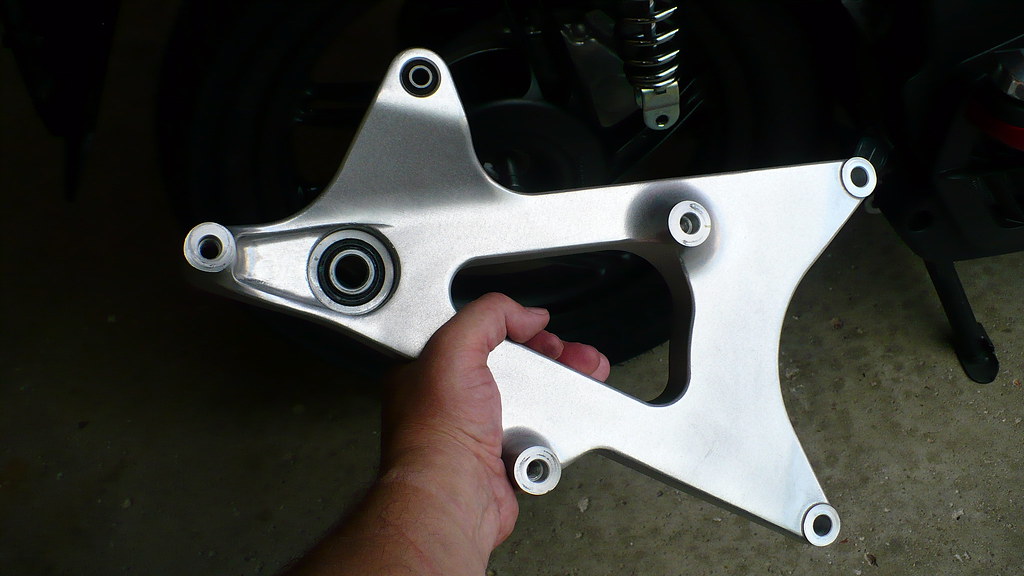
3) The swing arm is held in place by 2 bolts (14mm) and the axle nut (24mm) Also the rear shock absorber bolt (12mm) is secured to it.
4) Squeeze the rear brake the rear brake while loosening the axle nut. When reassembling, torque this nut to 87ft-lbs. (118 N-m)
Note: Be careful not to lose the bearing spacer on the back side of the swingarm. It is only held in place by grease.
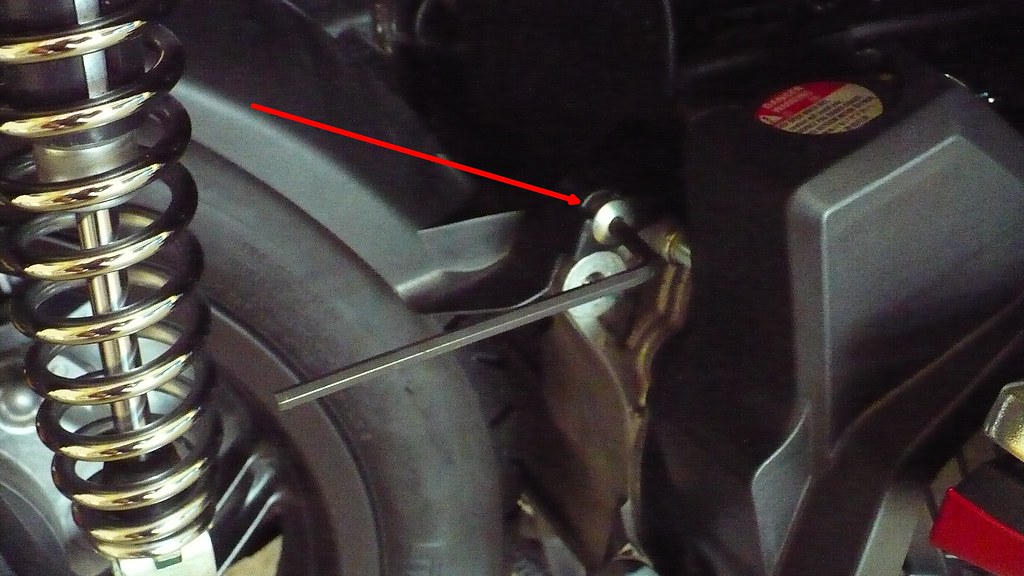
Finally, remove the 5mm Allen head bolt from the plastic mud guard. (3/16 allen will work if you turn slowly and do not strip the head)
5) Push the shock absorber and mud guard out of the way, then pull the wheel off the axle.
ASSEMBLY:
Reverse the assembly process with these additional instructions.
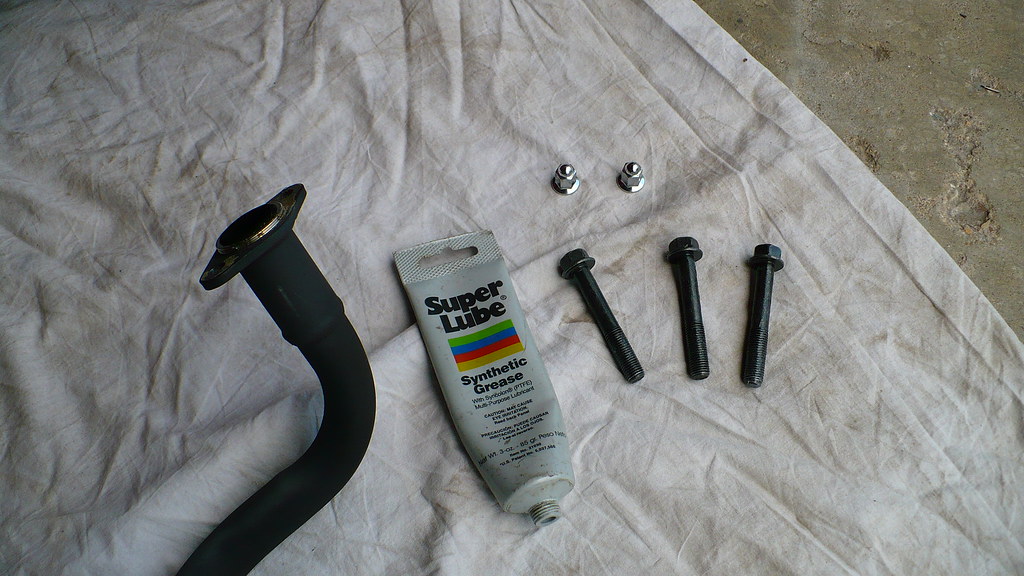
6) It’s a good idea to use anti-sieze compound on all the bolt threads. (grease works also)
7) While holding the muffler, insert the top bolt and hand-tighten it a few turns. This will allow the muffler to hang freely while you secure the manifold nuts.
Laying on the ground, use that handy mirror again to line up the muffler to the exhaust manifold bolts. Install the manifold nuts and finger-tighten until snug. Do not torque the nuts yet.
8. Install the remaining muffler bolts and finger-tighten all 3. Do Not torque these yet.
9) Now torque the muffler nuts. (as specified in the service manual)
Finally, torque the 3 muffler bolts. (as specified in the service manual)
10) Stand back and congratulation yourself on a job well done. Optional: Have a cold beer or take a nice long ride, but not both.
Nice how-to, but for the time it takes, removing the heat shield makes the job easier imo.
The mirror idea is a good one, I just fiddle around with my fingers... ooo-err missus as Frankie Howerd would say!
Remember that the exhaust gasket needs to be seated properly before and during re-assembly
Four decades on two wheels has taught me nothing, all advice given is guaranteed to be wrong
Wow! excellent slick! Great photo's....Thank you! This forum R o c k s
Location, Year & Color - Please enter Yours today!
How? Log in. Click the User Control Panel button (top right of any page). Upon destination, click Profile in left column. Look >See the questions? Please Complete. We Thank You
This is a good how-to to have, thanks for posting it!
The shop near my house charges $28 to replace a tire if the wheel is off the bike, and $60 if it's on the bike, so doing this yourself can save you a lot of money when your tire gets worn down.
While on the topic of tires, the standard tire sizes for the PCX are:
Front: 90/90-14
Back: 100/90-14
Also, I put up a handy tire calculator here to get an idea of how well other sizes will fit. There are many sizes that fit the PCX, particularly if you get a *slightly* wider tire: http://hondapcx.org/viewtopic.php?f=15&t=5
Currently ride: Nothing right now - mostly mountain biking with my boys until they're old enough to ride Previously rides: 2011 Honda PCX 125, 2005 V-Strom DL650, 1974 Vespa Ciao, 2011 Honda PCX 170 (tons of mods - takegawa 170cc big bore kit, gears, etc), 1996 Honda Nighthawk 250, 1987 Honda Spree, 2000 KTM 125SX, 2003 Honda Silverwing, 2007 Genuine Buddy 125, 1998 Honda PC800, 2008 Buddy 125 (white), 2008 Buddy 125 (red), 2001 Honda Reflex, 1987 Honda Elite, 1988 Honda Spree, 2007 Yamaha Vino, 2007 Honda Metro, 2x 125cc pure-chinesium dirt bikes
Did that with my Yamaha RD350LC.
It had been in for an egine repair, I got it back, fitted a pair of spanking new shiny shiny chrome Micron spanny boxes, set off down the road and immediately crashed it at a roundabout less than two miles from my home.
Four decades on two wheels has taught me nothing, all advice given is guaranteed to be wrong
I got to the part where I'm supposed to pull off the swingarm, but it won't come off the axle! I sprayed it with a bunch of lithium grease, and it rotates around the axle just fine, but it wont budge as far as coming off that axle.
Would this help?
A few blasts. Sit/penetrate. Spray again If necessary. Sit/penetrate.
Then....Bust a move
Maybe???
Attachments
image.jpeg (29.8 KiB) Viewed 64272 times
Location, Year & Color - Please enter Yours today!
How? Log in. Click the User Control Panel button (top right of any page). Upon destination, click Profile in left column. Look >See the questions? Please Complete. We Thank You
I've been hitting it with the WD-40. I'll look for some of that stuff too, though.
I noticed there's a bearing part in the middle that won't rotate. Not sure if it's supposed to. The swingarm rotates but the ring in the middle around the spindle does not rotate.
I guess next I'll try laying it on the ground and lifting by the swingarm.
If that doesn't work then I'll put it back together but leave some slack on the axle nut and rock it side to side as I push it down the driveway. I'm reluctant to get on top of it with it loose, though-- I don't want to bend the other side of the suspension!
Aaand I guess if none of that works I'll just borrow a pal's pickup truck and take it to a shop.
PB blaster works miracles, I use it when we're trying to unf*ck things on my friend's Jeep that were seized.
You really should use an impact gun to get it off if you have too much trouble. I am typically opposed to using impact guns for tightening (too easy for at-home mechanics like us to cross-thread things), but they're great for getting things apart!
Currently ride: Nothing right now - mostly mountain biking with my boys until they're old enough to ride Previously rides: 2011 Honda PCX 125, 2005 V-Strom DL650, 1974 Vespa Ciao, 2011 Honda PCX 170 (tons of mods - takegawa 170cc big bore kit, gears, etc), 1996 Honda Nighthawk 250, 1987 Honda Spree, 2000 KTM 125SX, 2003 Honda Silverwing, 2007 Genuine Buddy 125, 1998 Honda PC800, 2008 Buddy 125 (white), 2008 Buddy 125 (red), 2001 Honda Reflex, 1987 Honda Elite, 1988 Honda Spree, 2007 Yamaha Vino, 2007 Honda Metro, 2x 125cc pure-chinesium dirt bikes
Nice photos of this wheel removal! Good job.
(I photo'd a DIY of removing a Kymco LIKE200i rear wheel for a new Michelin Power Pure - only addition was I needed a cheap puller to gently remove the fork. And, agree an impact gun to remove that big axle nut is safer and less prone to flip the scooter when using a breaker bar!)
Again ,nice photos of a DIY on a clean scooter!
Fish